
Welding & Metal Cutting Knowledge Hub
Explore technical guides, machine selection advice, and industrial fabrication insights backed by 60 years of engineering experience.
How to Choose the Best TIG Welding Machine?
Choosing the right TIG Welding Machine is less about buying the model with the most features and more about matching its capabilities to your work. A hobbyist repairing thin stainless-steel panels has different needs from a shop welding aluminum brackets all day. Material type matters: aluminum generally calls for AC capability, while steel and stainless steel are commonly welded with DC. Check the machine’s amperage range, too. A stable low-amp start can help prevent burn-through on thin sheet metal.
Power supply is another practical detail. Confirm whether the machine suits your available outlet, and consider its duty cycle if you expect longer welds. Controls matter at the bench: a foot pedal or torch control can make amperage adjustments easier, while high-frequency starting can help initiate an arc without touching the workpiece. Small details count. Torch comfort, cable length, gas connections, and replacement-part availability can shape everyday use more than a crowded feature list.
The best choice depends on your projects, experience, and workspace—not a single universal ranking. A common mistake is paying for high output that the work rarely needs. The opposite can happen, too: a low-cost unit may lack the control or capacity required for planned materials. Compare specifications with the thickness and metals you actually weld, then review the manual and manufacturer support before buying. Be realistic. Requirements can change, and even a careful comparison cannot predict every workshop need. This guide outlines the key factors so you can weigh performance, usability, and budget with clearer expectations.
Define Your TIG Welding Needs and Work Materials
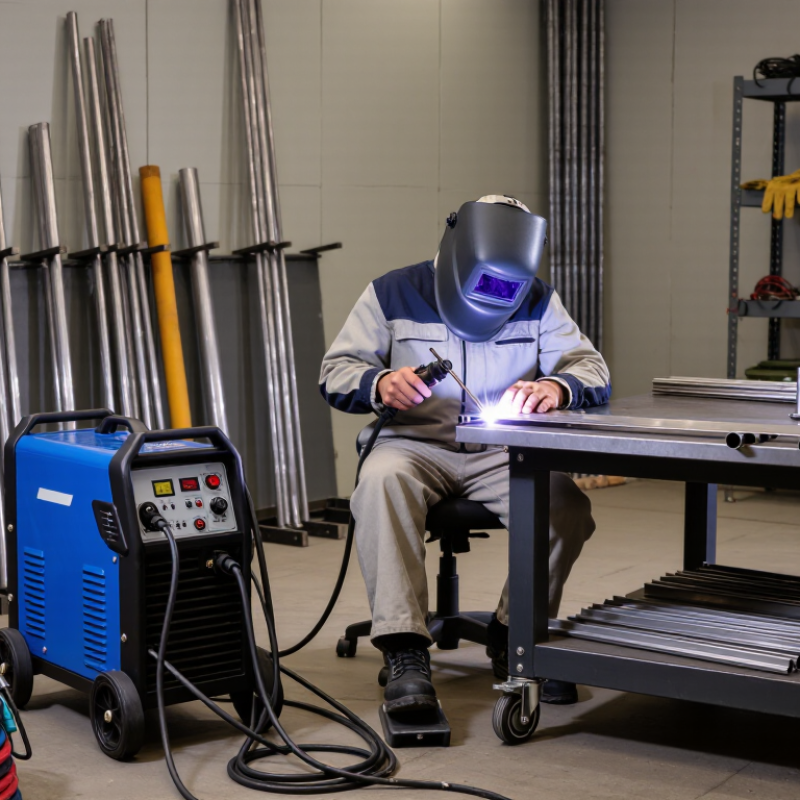
Before choosing a TIG welding machine, define the work it must perform. A repair bench for thin stainless steel needs different capabilities from a fabrication shop welding heavy aluminum frames. Write down the materials, thicknesses, joint types, and expected weekly workload. This simple record prevents an expensive mismatch.
Material choice guides machine settings. Stainless steel and mild steel usually require DC output, while aluminum normally needs AC with adjustable balance and frequency. Thin sheet may need precise low-amperage control, often below 10 amps, to prevent burn-through. Thick sections demand more power and a suitable duty cycle. Check the available electrical supply, too. A machine designed for higher input power may overload a small workshop circuit.
Think about how you actually weld. A foot pedal gives useful control when heat changes around corners or uneven joints. High-frequency starting helps protect the tungsten from contamination. Argon shielding gas, a stable torch, and correct tungsten preparation also affect results. The machine is only one part of the system.
Real workshop experience can challenge assumptions. More amperage is not automatically better. I once selected a powerful unit for occasional thin-gauge repairs, then found its controls less comfortable for delicate work. That mistake changed how I compare machines. Test the lowest usable output, arc stability, control layout, and torch balance before buying. Ask for technical data, not vague performance claims.
Compare TIG Machine Types and Power Sources
Choosing the best TIG welding machine starts with understanding its type and power source.
Inverter machines are compact, efficient, and easier to carry between work areas. They usually provide precise amperage control for thin stainless steel or aluminum. Transformer machines are heavier, but their simple construction can offer dependable service in fixed workshops.
I once underestimated portability and regretted moving a heavy unit across a crowded floor. That matters.
Power source selection depends on the metals and available electricity. DC TIG works well for steel, stainless steel, copper, and titanium. AC TIG is essential for aluminum because it helps break through the oxide layer. Some machines combine AC and DC, giving useful flexibility for mixed projects.
Pulsed TIG reduces heat input and can improve control on thin sheet metal. However, pulse settings may confuse beginners, especially when frequency and duty cycle change together. Keep it simple.
Check the input voltage before purchasing. A single-phase machine suits many home workshops, while three-phase power supports higher production demands. Review the duty cycle, not only the maximum amperage. A machine rated at 200 amps may overheat during long welds if its duty cycle is limited. Cooling design, torch comfort, foot-pedal response, and spare-part availability also affect real performance. Online specifications are useful, but hands-on testing remains more reliable when possible.
Check Amperage Range, Duty Cycle, and Input Power
When choosing a TIG welder, match its amperage range to your actual work. A low, stable output helps control heat on thin sheet, while thicker plate needs more current. Check both ends of the range; a high maximum means little if the machine struggles to maintain a clean arc at low amperage. Tungsten size, material, joint design, and torch cooling also affect the usable range.
Duty cycle tells you how long the machine can weld before cooling. IEC 60974-1:2017 uses a 10-minute period for duty-cycle ratings: 60% means six minutes of welding, followed by four minutes of rest at the rated conditions. A higher rating matters for long beads or repeated passes. Shop temperature and airflow can change real-world performance. Don’t treat the label as a promise under every setup.
Input power deserves the same scrutiny. Confirm supply voltage, phase, and circuit capacity before comparing maximum output; a machine may deliver less amperage on a lower-voltage supply. Picture a garage outlet, an extension cord, and a long weld: voltage drop can become a practical limit. This is easy to overlook. Check the machine’s input-current specifications against the outlet and wiring, and leave headroom for other tools. One imperfect assumption can turn a capable welder into a frustrating one.
How to Choose the Best TIG Welding Machine
Compare representative machine profiles by maximum welding amperage and duty cycle. Example specifications are illustrative; check a machine’s nameplate and manual before purchase.
Choose an amperage range that suits your material thickness and work. A higher duty cycle means more continuous welding time within each 10-minute period at the rated output. Also confirm that your available input voltage and circuit can support the machine.
Evaluate Controls, Torch Options, and Extra Features
When comparing TIG machines, test the controls you will actually use: amperage adjustment, pulse settings, AC balance, and pre- or post-flow timers. A clear display helps when you are wearing gloves and checking a setting between short welds. TWI’s TIG technical guidance places typical shielding-gas flow around 6–12 L/min, though cup size and setup affect the right value. Look for stable, easy-to-adjust gas controls, not just a large screen. Worth testing.
Torch choice affects comfort and access. A compact air-cooled torch can suit light, intermittent work; a water-cooled setup may be more comfortable during sustained, higher-current welding. Check whether the machine supports a foot pedal or fingertip control, and whether the torch connection matches your preferred setup.
If possible, hold the torch and try the controls before buying. A feature list cannot tell you how a cable pulls across a bench.
Extra functions should solve a real task. High-frequency start can help avoid touching the tungsten to the workpiece, while memory slots can save repeat settings for similar jobs. Pulse may help manage heat on thin sheet, but it adds another setting to learn. More features are not automatically better. I would compare the manual’s control ranges and accessories carefully; sometimes the small print is annoyingly important.
Match Your Budget to Safety and Maintenance Needs
When comparing TIG machines, budget for the whole workstation, not just the power source. Include a suitable helmet, gloves, gas, replacement tungsten, torch parts, and fume control. A cheaper unit may be sensible for occasional thin-sheet work, but check its duty cycle and service support before buying. A low sticker price can be misleading.
Safety costs deserve a real line in the budget. IARC’s Monographs Volume 118 classifies welding fumes as carcinogenic to humans, while OSHA sets a 5 μg/m³ eight-hour exposure limit for hexavalent chromium (29 CFR 1910.1026). That limit matters when welding stainless steel; it is not a substitute for assessing the actual job. Budget for appropriate ventilation and protective equipment, and verify what your workspace needs. Small details matter.
Maintenance is easier when you can afford routine checks and common replacement parts. Inspect the torch, gas hoses, cables, and work clamp for wear or damage; follow the machine manual for service intervals. Ask whether local technicians can service the unit and how long parts usually take to arrive. I would not trust a neat spreadsheet estimate too much: usage, dust, and transport can change upkeep costs quickly. Leave room for surprises.
FAQS
Inverter machines are lighter and easier to move. They offer precise amperage control. Transformer machines are heavier, but their simple design can suit a fixed workshop. I once underestimated the weight. That mattered.
DC TIG works well with steel, stainless steel, copper, and titanium. AC TIG helps weld aluminum by breaking through its oxide layer. An AC/DC machine can handle mixed projects.
Pulse can reduce heat input on thin sheet metal. It may improve control, too. But changing frequency and duty cycle together can feel confusing. Keep it simple.
Check that the input voltage matches your workshop. Single-phase power suits many home setups; three-phase power can support higher production. Review duty cycle, not only maximum amperage. A 200-amp machine may overheat during long welds.
Try the amperage control, pulse settings, AC balance, and gas timers. High-frequency start can help avoid touching the tungsten to the workpiece. Memory slots can save repeat settings. More features are not always better.
An air-cooled torch can suit light, intermittent work. A water-cooled setup may feel more comfortable during sustained, higher-current welding. Check cable movement, torch grip, and pedal response. A feature list cannot show everything.
Include a helmet, gloves, shielding gas, replacement tungsten, torch parts, and fume control. Check spare-part access and service support. A low sticker price can mislead.
Plan for suitable ventilation and protective equipment, especially when welding stainless steel. Inspect hoses, cables, the torch, and work clamp for wear. Follow the machine manual. Leave room for surprises.
Conclusion
Choosing the right TIG Welding Machine starts with understanding the materials you plan to work with, their thickness, and the types of projects you expect to complete. Compare machine types and power sources to find an option suited to your workspace and welding needs. Then review the amperage range, duty cycle, and available input power, since these affect the materials you can weld and how long you can work before the machine needs to cool.
Consider whether the controls are easy to adjust, which torch options are available, and whether useful extra features fit your work style. Finally, balance your budget against essential safety equipment and ongoing maintenance needs. A well-matched machine should offer reliable performance without paying for capabilities you are unlikely to use.

Blog Tags: